Monday, January 31, 2011

Jamieson Colour Palette

Hello Readers,

A lot of blogs have been talking about colour lately and I too have been swept up in that interest.
After all, colour is around us all day.
I'm sure it affects us without us even being aware of it.

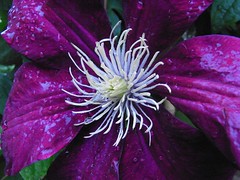
Various colours are said to have different effects on us - green is thought to have a calming influence, yellow to stimulate activity, and red to promote appetite.
I have often wondered if these supposed effects are really open to personal like or dislike of said colour.

When I was a child I could categorically say my favourite colour was blue. No hesitation.
It is said that blue reflects a "conservative" choice! Well, particularly dark and navy blue.

I used to say I dislike yellow, and yet the Daffodil is one of my favourite flowers.
The same applied to orange and yet I love the jaunty, orange nasturtium flower.
Brown was considered boring and dull (in my mind!) and black was just not worn when I was a child.

I also look back and compare the clothes then and the clothes now and I think they just were not as colourful as they are now. The choices were just not there.

These days I am in love with colour.
I would say there is not a colour I dislike.
There are still some colours I will not wear though, or perhaps only in a limited amount.

I look at my rods of glass in the studio and the colour selection is vast.
I often find it difficult to make a selection from this broad  range.
I have found the best solution to this dilemma is a self imposed limitation, selecting only 3 or 4 colours  at a time, seeing how they gel with each other and then adding or subtracting as I go, if necessary.

I have been trying to actively notice colour more.
Looking at a colour wheel and learning how it works has been helpful.

The other fun learning tool I have discovered is Photoshop "Elements".
I learnt "How to Make a Colour Palette" using Photoshop Elements from a fellow blogger, Brandi .
You will find it under "tip shares" on her blog.
She has an amazing blog with lots of informative tips, not to mention the most spectacular jewelry.

Anyway, here is a colour palette that I have put together using a photo of a water-colour painting of the countryside near Jamieson, a town in north eastern Victoria, Australia.

I love the greens and greys of the Australian bush contrasting with the yellow of the Poplar trees.


This has been a first experiment at creating a colour palette. I feel sure that with frequent use of the colour palette tool I will become more observant of colour combinations in everyday life. Hopefully I then will be able to apply colour choices more confidently both in glass selection and jewelry making..
I am certainly going to do a few more!  They are fun to make.

Cheers for now,
Jenni

At Long Last , Bead Love returned.

After reading yesterday that my Bead Soup  partner Grace had received her package from me, I was  keeping my fingers crossed that mine would arrive today, and it did!

I couldn't get to my letter box fast enough when I saw that tell-tale yellow envelope  poking it's corner out.
I started to open it and then thought,  "woops, got to take photos"

So, I will walk you through it....


Gorgeous little box and foliage.


Pretty packaging and card


The huge pile of lovelies.


The totally beautiful crazy lace agate focal, with clasp and connector.
I can't tell you how lovely this is, it is delicate and so beautifully made.
And it all ties in together so well.
I am SO thrilled to receive these beautifully crafted pieces.


A selection of gemstones. I am  totally mad about gemstones!


Gemstone names. 


Exquisite coloured pearls.


Grace, thanks so much. I am in awe of your silversmithing work and am hugely happy with all the lovely extras you have sent me. Hope I can do it justice!.


Hope all BSBP participants are receiving their parcels and  liking theirs as much as me!
Until next time,

Jenni


Thursday, January 27, 2011

A glass journey - Goblets

I have always loved glass.

Twenty-six years ago, ( OMG really!) my husband purchased 8 glass goblets as part of a wedding gift to me.

We had first noticed the goblets at a restaurant that we used to frequent: "The Cat's Tango", in St. Lucia, Brisbane.
So we drove down to Byron Bay N.S.W. to find the  glass maker, Colin Heaney.

At his studio we were entranced to watch him as he made the goblets from recycled glass, dipping the gathers of hot glass and rolling it in the various coloured frit ( small pieces of crushed glass).


Who would know that years later I would be doing a similar thing in my own back - yard studio (a little shed really!), using MUCH smaller amounts of glass and frit to make lampwork glass beads!

Colins' glass goblets became more refined over the years - far more delicate and also with a lot more detail.

However, I still love his early, rustic style the best!

Here are some of the goblets and the crazy, tortuous stem on one of them.

Cheers for now,

Jenni

Wednesday, January 26, 2011

Bead Table Wednesday.

Well it is already Wednesday here in Australia!

So here is a little photo of my bead-board and the beads that I am presently working with.
Let me explain why I have taken this particular photo...

I have joined up to the Yahoo Flickr group, BTW (Bead Table Wednesday), organised by Heather at Humblebeads. (Click BTW logo on the left of this blog to go to BTW.)

The purpose of joining the BTW group is that participants take a photo of what we are currently working on, write about it on a Wednesday, and then also post the photo to the Bead Table Wednesday Flickr site.
It's a great way to get motivated, to work at creating a piece of jewelry. Stop that procrastination!

It is also a wonderful source of inspiration to see photos of  beading items other members are using to create their own projects.

I thought I would use some of the remaining beads I had left over from the Fusion Bead challenge, which was organised by Lorelei (see my previous blog-posts).

The gorgeous little owl was made by my friend,  Georgie - isn't he totally adorable!
The photo was taken on my iPhone using the Hipstamatic app.

I hope to finish up the piece in a day or two, so please come back to check it out!


Happy beading,

Jenni

Saturday, January 22, 2011

Fusion Beads Reader Challenge/ Pod and Vine necklace, no 2

Hi everyone,

I was asked by Regina to see a full photo of the necklace I made for the challenge.
I do find it hard to photograph a necklace in it's entirety (hence my collage.


Anyway, I have given it a go.

And here it is.

Cheers,
Jenni

Friday, January 21, 2011

Fusion Beads Reader Challenge/ Pod and Vine necklace.

Hello and welcome,

I decided to increase my participation in the online beading community this year - so to start the ball rolling, I joined the Fusion Beads Reader Challenge via lorelei's blog.

Everyone in the challenge had to purchase the same set of basic components.

These consisted of:
          1. Olive green leather cording
          2. Fire Polished Glass beads, Transparent Gold/Smoky Topaz, and Transparent Green
              Luster, 12mm
          3. Matte Metallic Teal/Gold Iris Drop Japanese seed beads 2.8mm
          4. Tiger Kamagong Ebony Hardwood round beads, 5mm

These all came from Fusion Beads.


Seed Beads
Fire Polished Bead


Also on the list to buy from Fusion was Matte Dark Hunter Lucite walnut leaf charms - however, due to demand, these were unavailable, so I ended up purchasing matte dark olive Feather leaves, 13x23mm, from The Beadin' Path.

The nominated 27mm Pewter Owl  Round Toggle Clasp came from Green Girl Studios


Owl Toggle Clasp

The idea was also that we could add components of our own choosing to the mix and create a jewelry item of our choice.  I chose to make a necklace.

I chose to add silver cones with a "vine" motif, aquamarine gemstone beads and a gorgeous pod-style borosilicate glass lampwork pod  pendant, made by Gail Crosman Moore
(I hope this is correct, I did purchase this years ago, 2004 to be precise, and it has been waiting patiently in my bead stash  for it's chance to shine!)

When deciding on my design, I was inspired by the glass lampwork pendant and it's wonderful organic colours. It reminded me of something in a garden that you don't really appreciate until you stoop to inspect a little more closely to see it's full beauty.

It made sense to me to loosely weave the seed beads, aquamarine beads and the olive leather cording together, in a vine-simulation, the leather being the thin tendril weaving it's way through.
These were then all attached to wire which was then threaded through the silver cones.
I found this the most difficult task technically as I had never created anything like this before.

The glass pod was tied through it's embedded wire loop by a co-ordinating green and light brown silk ribbon to the centre of the multiple strands.  I may have to change the silk ribbon later on as I feel it may not be strong enough for the long term.

A few leaves and little beads were added to a dangle attached to the pod.

The fire polished beads, separated by the small Kamagong round beads, made up the rest of my necklace between cones and clasp.

The Pewter Owl toggle clasp was attached at the back of my necklace. A shame really because it is too beautiful to be hidden.  I do have another of these and next time want to use it at the front where it can be seen.


All in all I feel pretty happy about it.  The one thing that I am still thinking about is the balance of the two sections - whether I should have had a shorter length of the central interlaced strands and a longer run of the fire polished beads, so that the larger beads could be seen a little more . Oh well, I'll live with it for a while and see if I really feel compelled to change it.

I learnt a few new techniques along the way and worked with tiny drop seed  beads which was also new for me.
It also made me think about colour co-ordination and what is pleasing to my own eye.

Thank you to Lorelei  for co-ordinating the challenge, it was fun.

Please take a moment to go through the list below of other participants. I am sure there is a wide variety of inspiring designs. I know I will be spending quite a bit of time looking through all of these great blogs.


http://erinsiegeljewelry.blogspot.com/
http://beadhappytoday.blogspot.com
http://thebeaddreamer.com/blog
http://dreamsomedesigns.blogspot.com
http://beadingbymalindekoning.blogspot.com
http://fryestyle.blogspot.com
http://madmaggiedesigns.blogspot.com
http://reginaswritings.blogspot.com
www.mylifeunderthebus.typepad.com
maryhardingjewelrybeadblog.blogspot.com
http://silverrosedesigns.blogspot.com
http://fireflymyst.blogspot.com
http://lindalandig.wordpress.com
http://awishandacloud.blogspot.com
http://spiritrattles.blogspot.com
http://formysweetdaughter.blogspot.com
http://songbeads.blogspot.com
http://beautifullybrokenme.blogspot.com
http://threeredbeads.blogspot.com
http://christinec3.blogspot.com


Happy browsing!

Jenni

Thursday, January 20, 2011

Hipstamatic App Photos.

Like many iphone fans, I have been having a bit of photographic fun using the iphone app, Hipstamatic.
I have had it loaded up for a month or more but, until now, have not posted any of the photos I have taken using this tool.

I love the fact that it makes images appear a little old and faded. However, I think it is still important to carefully choose the appropriate topic for the best 'look' using this effects app.

I love the appearance the app gives to these hats and the woven bag. They appear aged when they really are not THAT old.


I am yet to fully explore the other features like  colour filters, black and white supergrain, infrared, glitter lens or the Lucifer lens.
I love black and white so think I will try that next.


My childhood teddybear, "Johnny" actually is getting on in years (as is his owner!), so he does suit the photo technique quite well.


Hipstamatic is available on the Apple iTunes App Store for something like $2.49.
There are some add-on effects packs for $0.99 cents each -- so it is affordable fun.

Cheers
Jenni

Wednesday, January 19, 2011

JUST BEGIN IT!

This  quote really speaks to me.
Don"t procrastinate,  just simply begin!

On another note, I have been changing my blog around, just having fun with colours and settings.
What do you think of a black background?
I'm not too sure if  I will keep it that way, however I do love the way the photos really 'pop' against the black.
Hmmm, to keep or not?  I  will live with it for a while and see..
Any comments welcome.


Cheers,
Jenni

Monday, January 17, 2011

Fire Opals 2

The fire opal technique has been around for a while but thought I would revisit it yesterday.
I learnt the technique from Amber at lampworketc
It is made using Double Helix Glass, 'Ekho' over silver foil.

I find it  a challenge to repeat the same/similar colour range, yes I know Practice, Practice, Practice!
I will do a little more tonight!

Fire Opal Beads


Fire Opal Beads


Capped & Cored Fire Opal Beads


Copper Capped Large-holed Bead


The other exciting news I wish to mention is I have been teamed up with my Bead Soup Blog Party buddy.
Her name is Grace and you can see her work at her blog,

Suddenly Last Summer


Please check out her blog, Grace makes gorgeous pearl and silver jewelry.
I am thrilled to be paired with her, it will be an exciting challenge for me to work on something for her, especially after seeing her lovely pieces.

Cheers for now,
Jenni


Tuesday, January 11, 2011

Bead Soup Blog Party

To participate even further in the online beading community fun, I have also joined up in the Bead Soup Blog Party, organized by Lori Anderson

This works in a different way to the Blog Hop.

Each registered participant sends a focal bead, some co-ordinating spacers or beads, and an interesting clasp to another party member. (nominated by Lori)

When each person receives their  surprise collection of beads, they take a photo of those beads and posts it on their blog.
A jewelry item is then made using those components.

On Blog Party Day, (Saturday february 26th), the completed item is revealed on each participants blog.
So far there has been an amazing 145 people (and still going) register to join in.
Please check out Lori's blog to read about this amazing event.

I can"t wait!
Cheers,
Jenni

Bead Soup Blog Party

Sunday, January 9, 2011

A Gift

Just recently I was given this old typewriter.
It doesn't work of course, the top part (? Name) has seized and I can't imagine the ribbon is any good.

My original idea was to take off the round keys and make them in to a bracelet.
However after protest from the family and realizing how difficult this actually would be, I gave up on the idea pretty quickly, so now it is a rather large 'ornament' around the home!

My father was a journalist who used to write on his typewriter at home.
I remember the constant "tip-tap" coming from his work room.
Originally he did have a typewriter similar in style to this one.
The typewriter models became updated through the years until finally, he had a very quiet, electric typewriter and that background tip-tap noise disappeared.

I compare that way of writing; noisy and a little messy (the dreaded carbon paper!), with the ease of use of this iPad.

Will the iPad still be around in 50 years or will it too, become a writing tool antique?!


Cheers,
Jenni


- Posted using BlogPress from my iPad

Sneak Peak

I wish 2011 to be a year of personal growth, a year of challenges and a year of participation.
So to start the year off in the direction I wish to go, I have joined up to participate in a bead blog hop.
It has been organized by Lorelei, at loreleis Blog

This is where the participants all have the same bead components (there actually will be some differences as additional personal choices can be made).
Everyone makes an item of their choice and on a designated reveal date,( Friday, January 21st), all finished jewelry pieces will be shown on blogs, with links to other blogs to browse.
It sounds like a lot of fun and I can't wait to see everyone's pieces.

On the reveal date I will describe more about the components etc, but for the moment am just showing these few photos!

Cheers,
Jenni


-Posted using BlogPress from my iPad

Saturday, January 8, 2011

Etched Discs

I recently saw a gorgeous necklace in a magazine that used old Roman glass discs as it's main component.
It made me wonder if I could make something similar myself.

So I made the discs and a few focal pendants using various transparent glasses.
I then aged them by soaking them in an etching solution to give them that old/beachy glass look.

The pale aqua "took" very quickly and in the photos appears almost white.
The darker, more intense colours took a little longer soaking to achieve a similar look.
I'm pretty happy with the look that I achieved, and at a mere fraction of the price it seems like a good option.

Cheers ,
Jenni


- Posted using BlogPress from my iPad

Sunday, January 2, 2011

Clematis

Prior to Christmas we visited Cloudhill for a family lunch.
Cloudhill is a wonderful garden in Olinda in the Dandenong Ranges,east of Melbourne.
It was a very cold, rainy day so we couldn't walk the very extensive gardens, however I managed to see these glorious Clematis, a plant I have had no success with in my own garden.
I think after seeing these I will just HAVE to give it another go!

Cheers,
Jenni


- Posted using BlogPress from my iPad

LinkWithin

Related Posts Plugin for WordPress, Blogger...